Version control is one of important things that you should consider when you work as a team with some people in a project development. In software development, there are some version control tools that can maintain application source codes such as
Git and
SVN. Main different between them is the use of local repository. SVN doesn't use any local repository so every committed changes will be stored directly to and maintain by remote SVN server. But, when you use Git, you must create local repository first. Pictures below show you the difference.
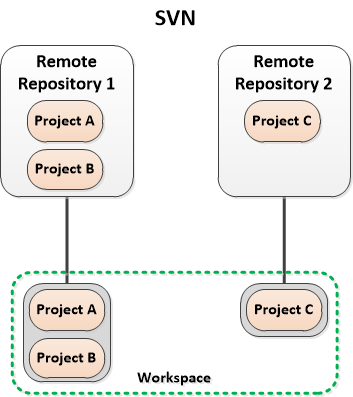 |
| SVN scheme |
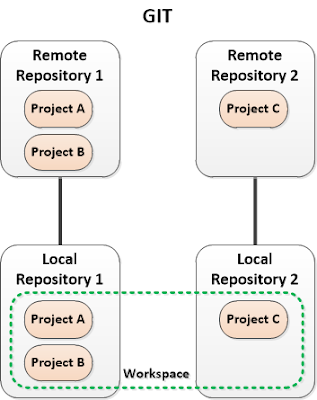 |
| Git scheme |
You can use Git with some tools such as command line tools and desktop client applications. In this post, I will only show you how to use Git with Eclipse.
Set Up Remote Repository on GitHub
There are many Git repository service providers such as GitHub, Sourceforge, BitBucket, etc. But, I will use GitHub as example.
- Create new account on GitHub.
- Create new repository on GitHub. As a free member, you only can make public repositories. In this example, my repository name is "test".
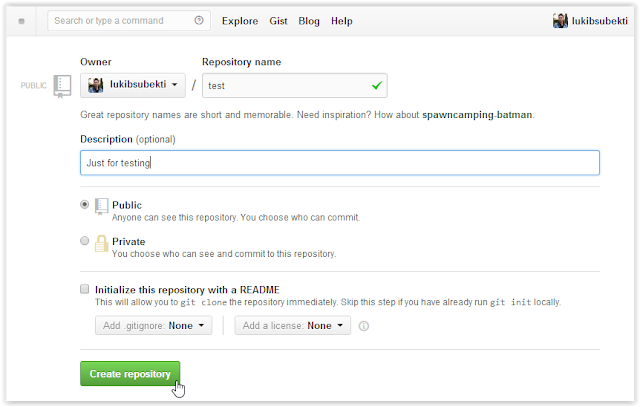 |
| Create new repository |
- Copy your Git repository address. For example, my repository address is "https://github.com/lukibsubekti/test.git".
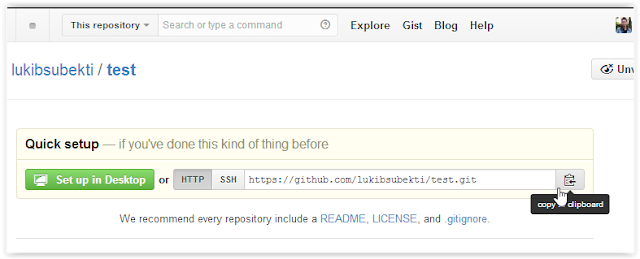 |
| Copy repository location |
Install EGit in Eclipse
Some Eclipse distributions have installed Git tools. But if there's no Git tools in your Eclipse, you can use EGit plugin.
- Choose Install New Software on Eclipse.
- Set software repository location to "http://download.eclipse.org/egit/updates".
- Install "Eclipse Git Team Provider".
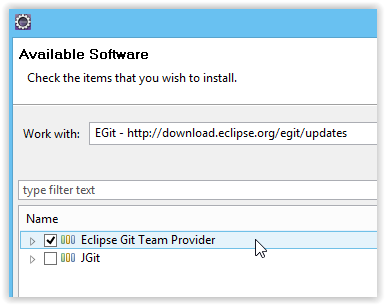 |
| Install EGit |
Create Local Repository, Commit Changes, and Push to Remote Repository
For this tutorial, I have built another project named project_X and stored it in GitHub repository. I have no local copy of this project. So, I must clone the project from GitHub first.
- For example, the project is in remote repository at "https://github.com/lukibsubekti/test2.git".
- In Eclipse, choose File --> Import --> Project from Git --> Clone URI. This step will create local repositry. I place the local repository in "D:\git\test2\.git".
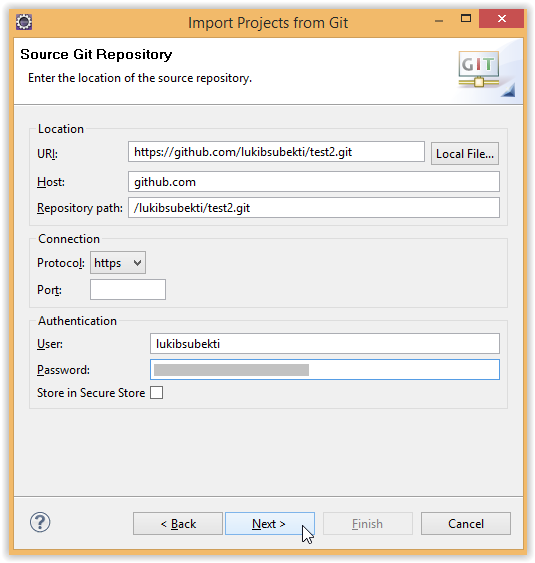 |
| Clone from remote repository |
- Because project_X in the repository is an Eclipse project, you can choose "Import existing project" in wizard for project import. It will create a project and place it in "D:\git\test2\project_X".
- If there's no project configuration file (or other IDE configuration files) in remote repository, you can choose "New project wizard". If you choose new project wizard, at project creation section, you must choose project directory which has been created in local repository directory (eg. "D:\git\test3\project_name" not "D:\Web Projects\project_name").
- Now you have local repository and the project.


Comments
Post a Comment